- Introduction
- Hardware Setup
- Working Methods for Flashing in Windows
Introduction
The ESP01s is an 8-pin board with an ESP8266 on it, and oh boy are they cheap (can be had for as little as $2.39, even in the shortage!). It’s got 2.4 GHz wifi, serial, 2 gpios and an onboard LED. However, there is no way to flash it out of the box. Therefore, an external serial device is needed.
The Arduino UNO includes a USB-serial passthrough capability when the reset pin is shorted to ground. Using this functionality, it can be used as a way to flash certain micros and boards over USB, which themselves are lacking that connection.
Hardware Setup
Required Materials
The ESP-01s is only 8 pins, but it is easily flashable with a small set of components:
- ESP01 (I used a breakout board board)
- Arduino Uno (or similar)
- USB cable
- 2.2K Resistor
- 3.3K Resistor
- Breadboard
- Pushbutton
- Jumpers
Pin Outs
Hook up said components like so
Grounding the reset pin on the arduino configures it as a passthrough serial.
Grounding the GP0 pin on the ESP01s puts it into bootloader mode
The arduino serial voltage level is 5V, so we use a voltage divider to get to the 3.3V the ESP8266 uses
(You’d think TX->RX, right? I think one of my boards may be mislabeled)
| ESP01s | Arduino |
|---|---|
| GND | GND |
| VCC | 3.3V |
| CHPD | 3.3V |
| GP0 | GND |
| TXD | TX/D1 |
| RXD | RX/D0 |
| RST->Button | — |
| — | RST->GND |
Forgive my first KiCad schematic. My fridge does not have a magnetic front, so this is the closest place I have to post it

Here is a picture of the described setup 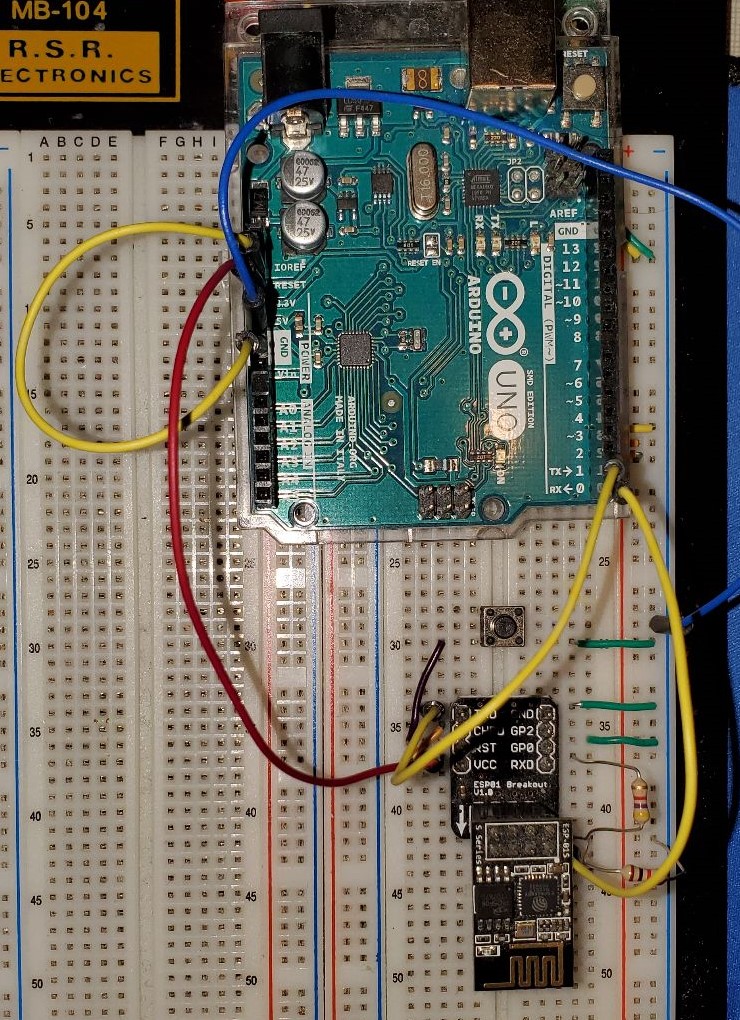
Working Methods for Flashing in Windows
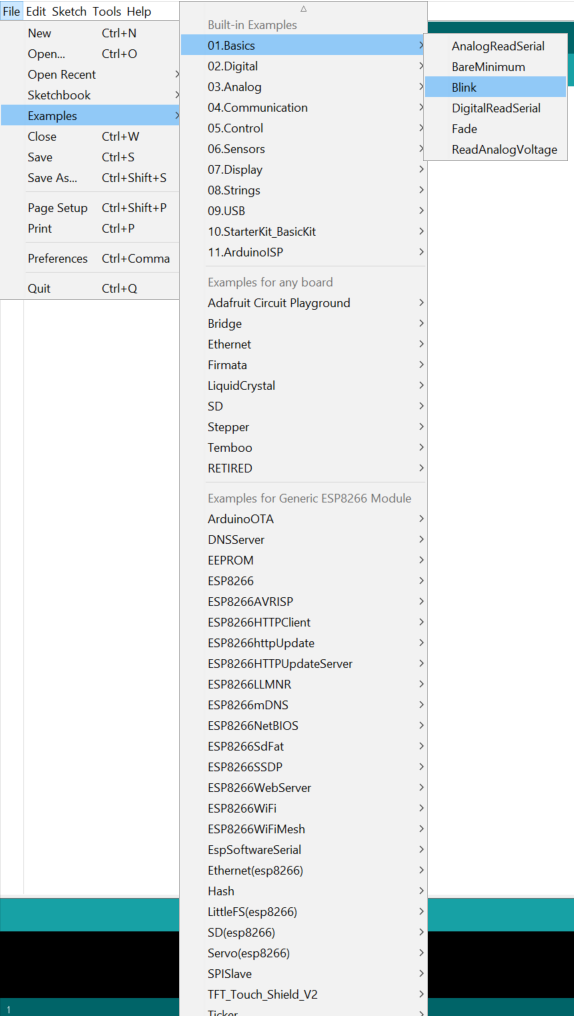
Flashing ESP-01s with Arduino IDE
ESP8266 Arduino Core has instructions to download the ESP8266 board profile. Do that.
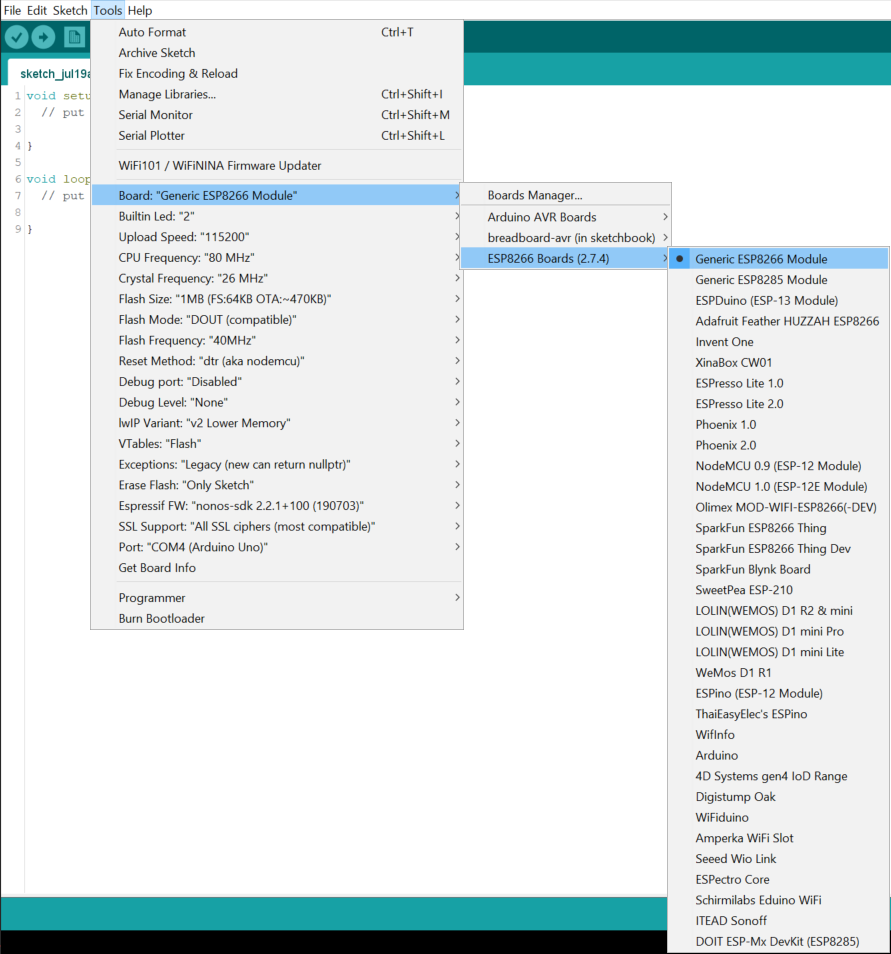
Select the board (Generic ESP8266 Module)
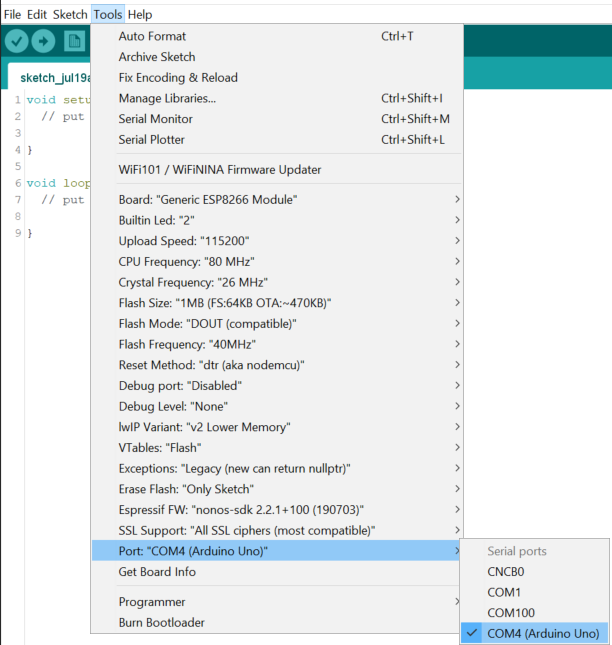
Set the port (which has your arduino device (COM4 for me))
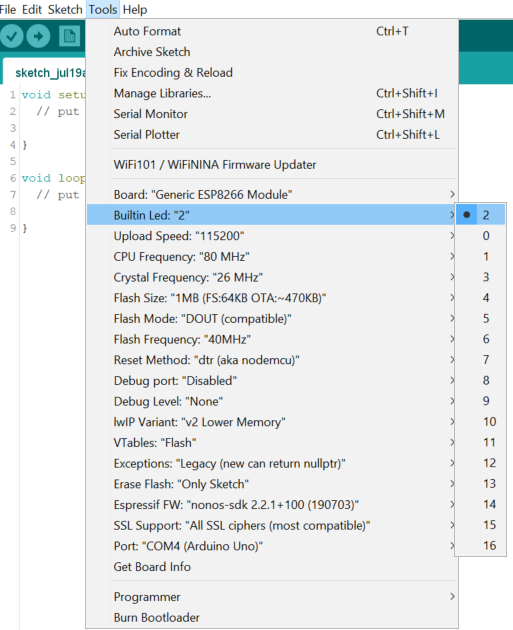
Set the Builtin LED to 2
Load up blinky
Press compile/upload. If there’s trouble connecting to the ESP01, press that button that’s connected to reset the ESP01 into bootloader mode. A blue LED should flash if it’s hooked up properly.
Once it’s finished flashing, unplug the USB, and un-ground GP0 on the ESP01s plug the USB back into provide power, and our ESP01s should be blinking on and off (success!).
Building and flashing with mingw
Setup Environment
This is all based on the official Espressif getting started docs
Make sure you’ve got your IDF cloned somewhere from the last post.
Also grab the xtensa toolchain
We will need the mingw32 terminal from MSYS32
To make things easier, move the examples\get-started\hello_world folder to your project folder
in the MSYS32, run mingw32.ext. To get to your projects folder, cd /<YOUR_DRIVE>/.../esp (which shall now be referenced as <YOUR_ESP>)
Add the xtensa tool chain binary folder to your path export PATH=$PATH:<YOUR_ESP>/xtensa-lx106-elf/bin
Set your IDF_PATH export $IDF_PATH=<YOUR_ESP>/ESP8266_RTOS_SDK
Building and Flashing
Now cd to your hello_world folder with cd <YOUR_ESP>/hello_world
do a make menuconfig and select Serial flasher config, 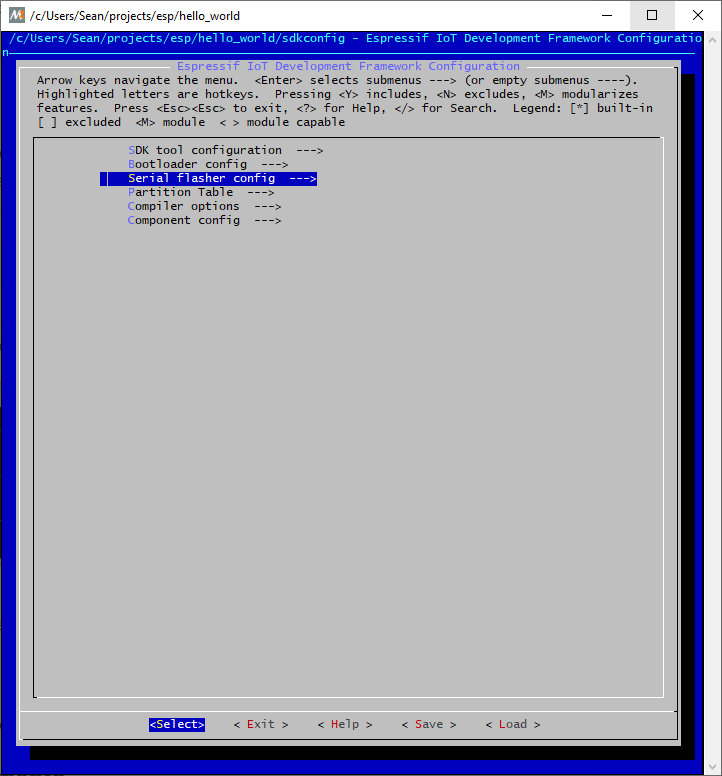
then select Default serial port and hit enter. 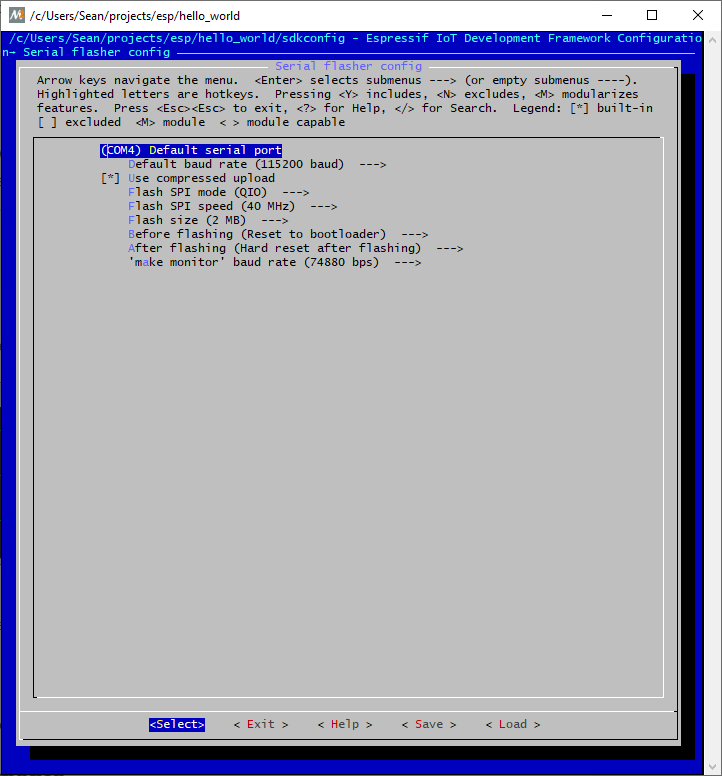
If you know your port, great, if you don’t, you can check the arduino IDE, or you can check your system devices under COM ports. 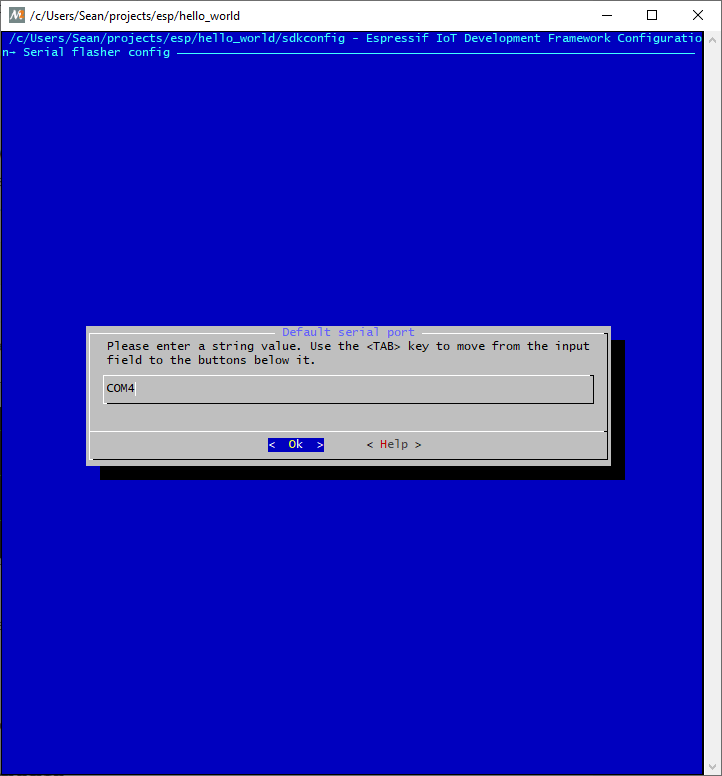
Use the arrow keys to select the save option at the bottom and hit save. Then Exit.
Now, do a make flash. Theoretically, you should see a build happening.
After the build, comes the flash 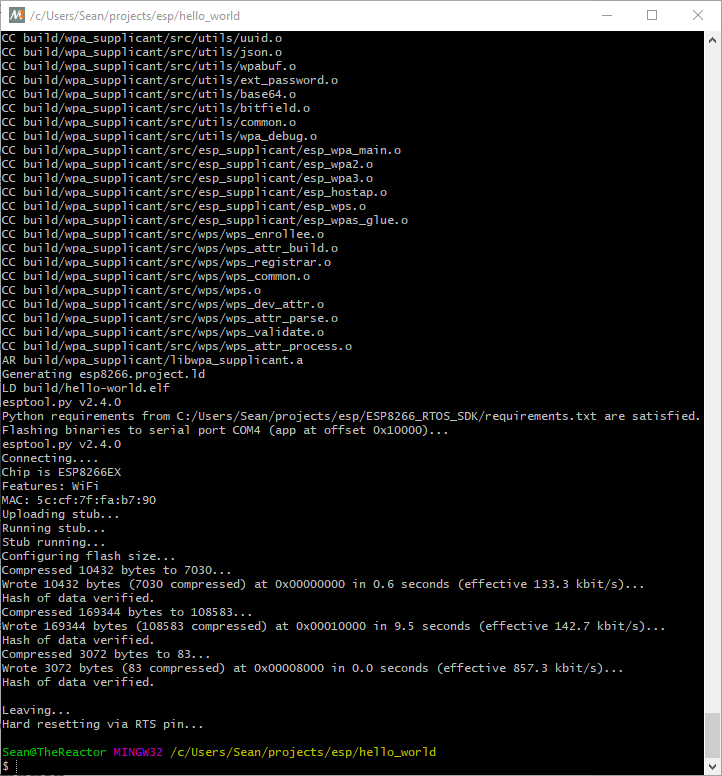
We can check our flash was a success with make monitor 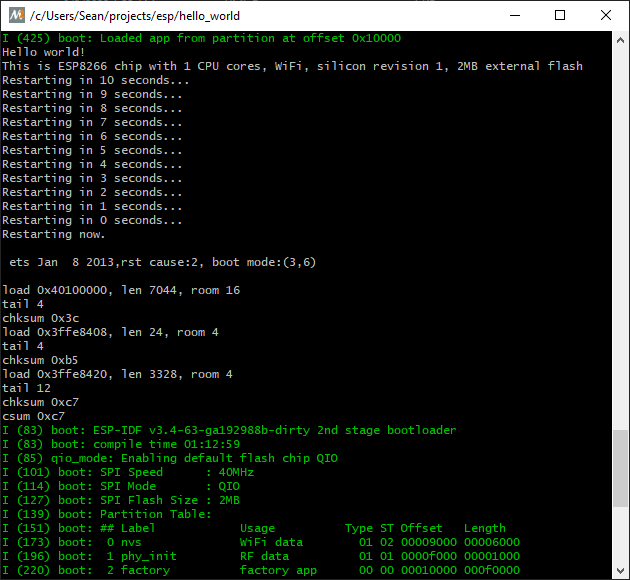
Troubleshooting
If your ESP01s is not lighting up with the serial, try resetting it with. The LED lights up on every reset of the board. the button in on the breadboard. If that isn’t the issue, doublecheck your COM port
Flashing with CLion + PlatformIO - Broken
Setting up PlatformIO with Clion
PlatformIO has documentation here, but I will walk through it.
Open the CLion plugin menu using
ctrl+shift+Aand typeplugins.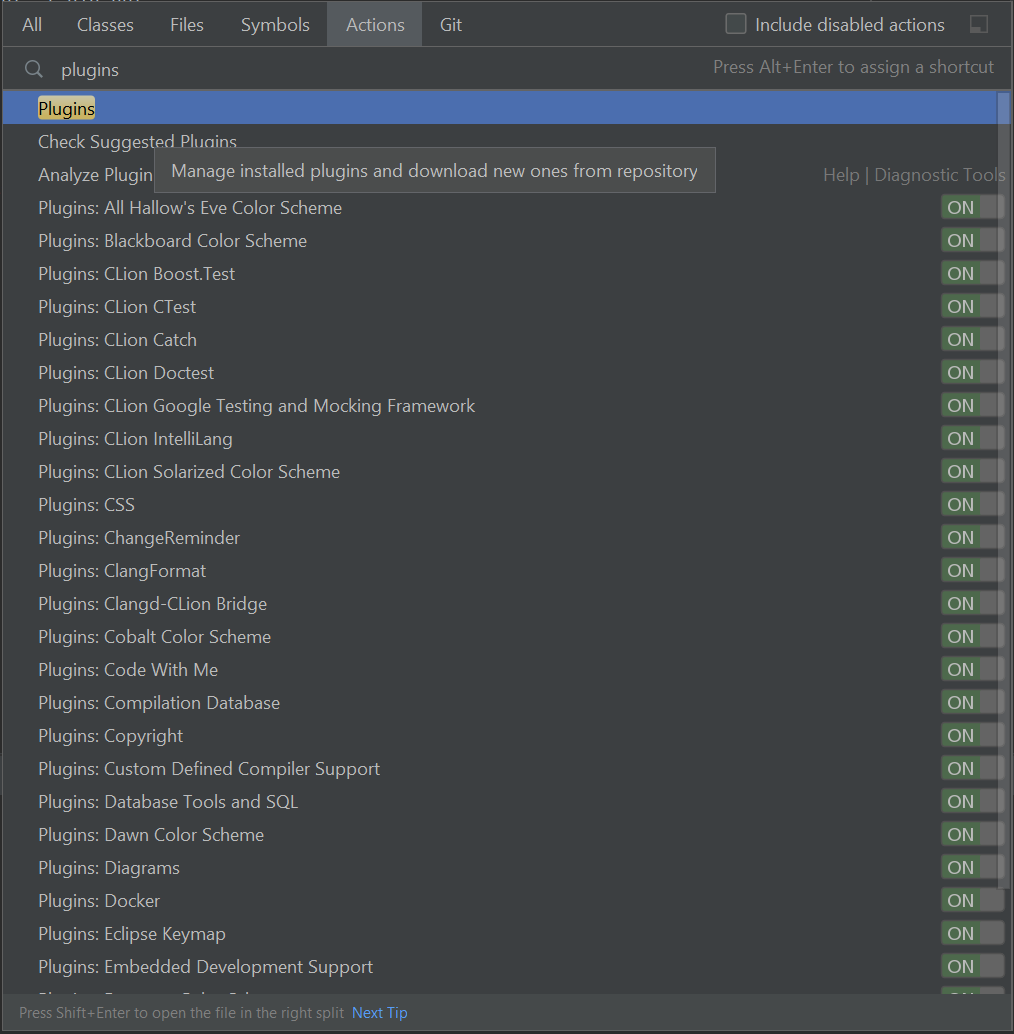
Install the platformIO plugin, by searching for
PlatformIO.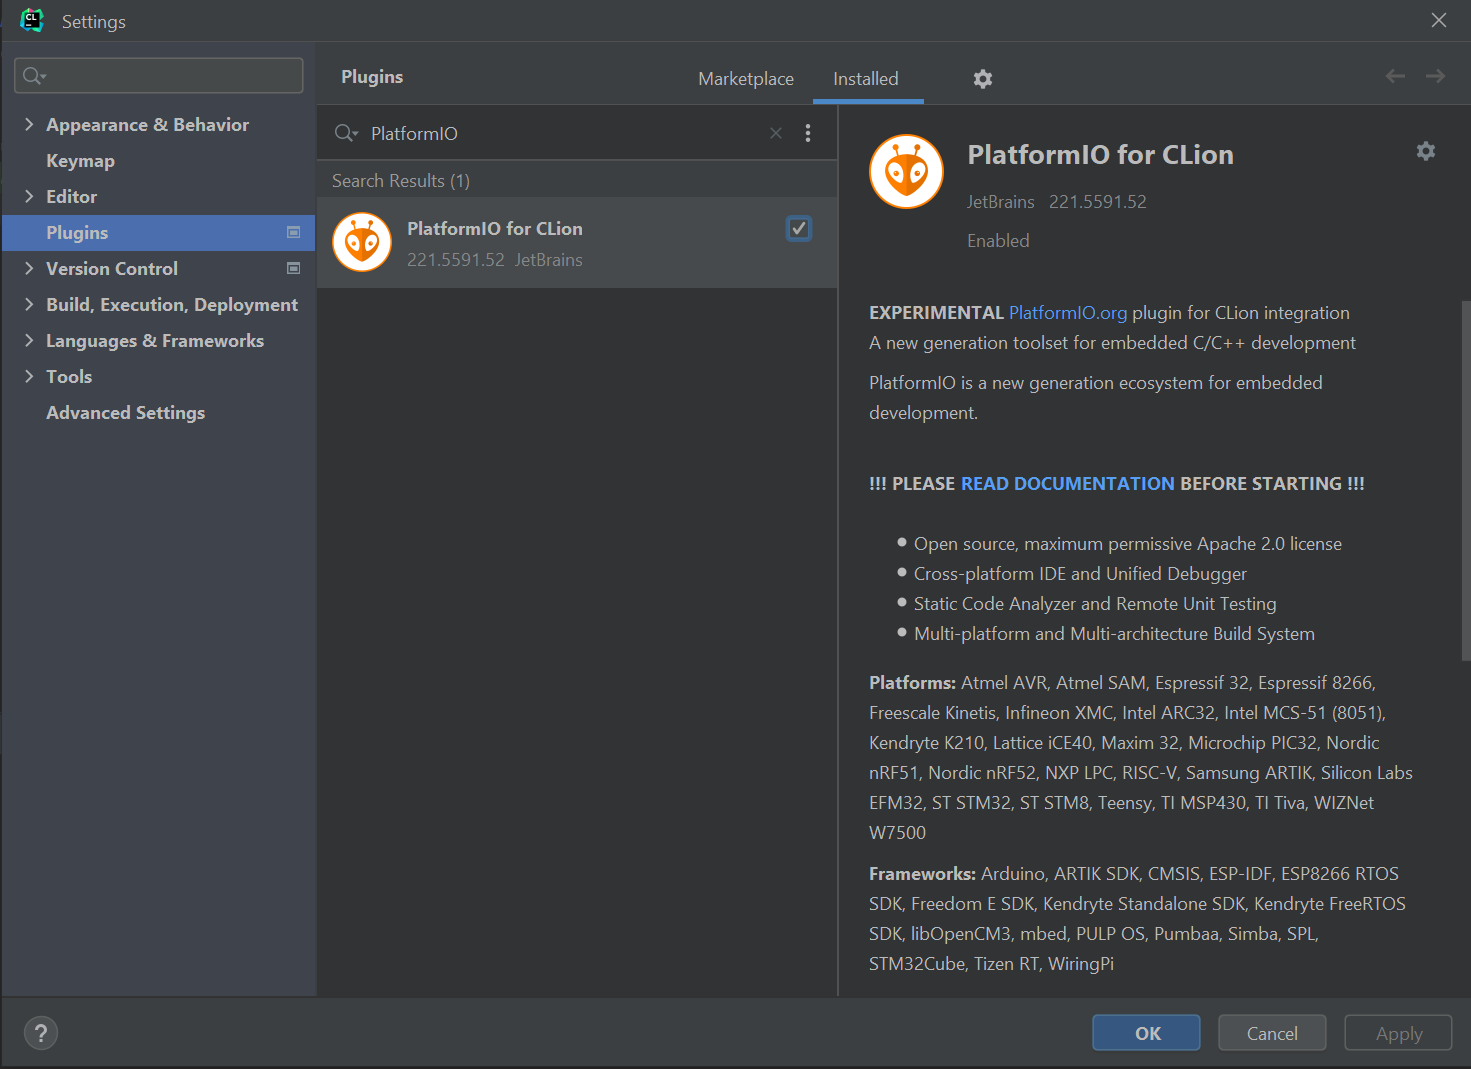
Configuring PlatformIO with CLion
PlatformIO automatically downloads configurations for a project if it doesn’t already have them.
Create a new PlatformIO project:
File->New->Project....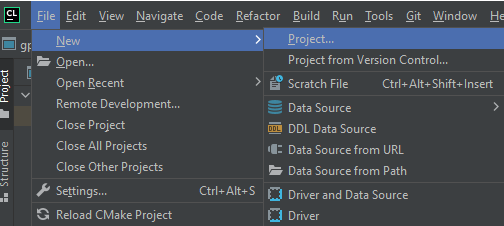
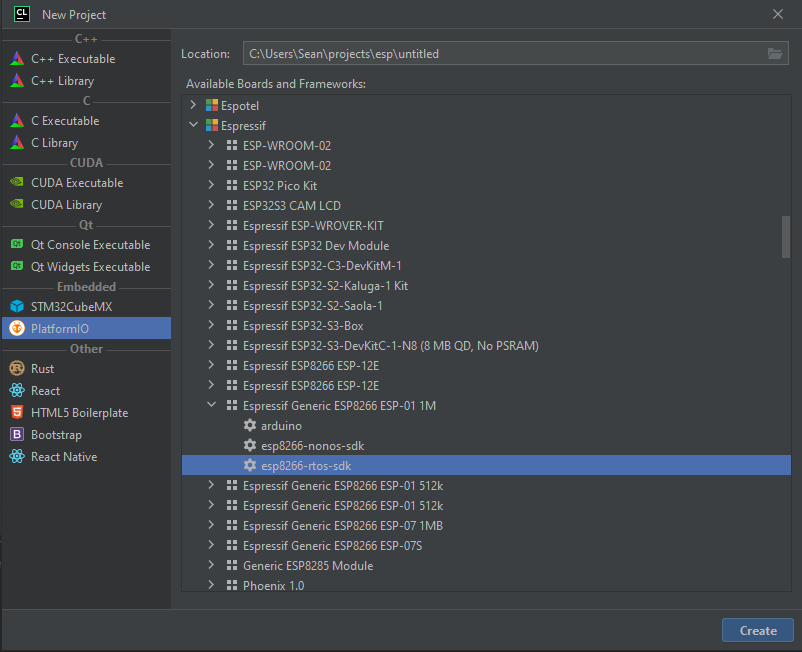
Select
PlatformIO->Espressif->Espressif Generic ESP8266 ESP-01 1M->esp8266-rtos-sdk.Note: Make sure to check the onboard memory, and that it matches
The PlatformIO project should be configured
Setting up an existing project
PlatformIO is nice enough to supply us with examples at
https://github.com/platformio/platform-espressif8266. Clone that baby wherever you want, and we can get started.Open your blinky folder example folder in clion
platform-espressif8266\examples\esp8266-rtos-sdk-blinkand create a clion project out of it
The default blinky project is set up to blink gpio16. We don’t have that, and that’s not where our onboard LED is. So, we’re going to replace
 void task_blink(void* ignore)
 {
     gpio16_output_conf();
     while(true) {
         gpio16_output_set(0);
         vTaskDelay(1000/portTICK_RATE_MS);
         gpio16_output_set(1);
         vTaskDelay(1000/portTICK_RATE_MS);
     }

     vTaskDelete(NULL);
 }
with
 void task_blink(void* ignore)
 {
     GPIO_ConfigTypeDef config = {.GPIO_Pin = GPIO_OUTPUT_IO_0,
                             .GPIO_Mode = GPIO_Mode_Output,
                             .GPIO_Pullup = GPIO_PullUp_DIS,
                             .GPIO_IntrType = GPIO_PIN_INTR_DISABLE};
     gpio_config(&config);
     GPIO_OUTPUT_SET(GPIO_OUTPUT_IO_0, 0);

     while(true) {
         GPIO_OUTPUT_SET(GPIO_OUTPUT_IO_0, 0);
         vTaskDelay(1000/portTICK_RATE_MS);
         GPIO_OUTPUT_SET(GPIO_OUTPUT_IO_0, 1);
         vTaskDelay(1000/portTICK_RATE_MS);
     }

     vTaskDelete(NULL);
 }
so our onboard LED will blink.
We’re also going to want to remove the build actions that Clion has attached to the PlatformIO actions. We want go to the action dropdown in the menu, and select
Edit Configurations...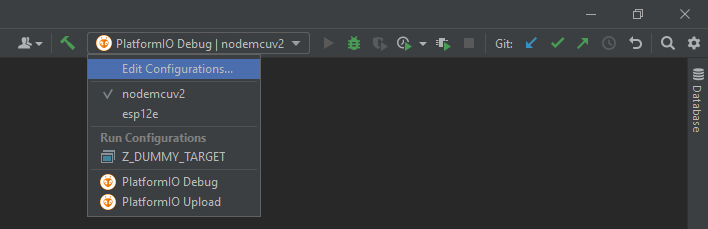
For each of both the
DebugandUploadoptions, remove the build stage by selectingbuildand hit the-button.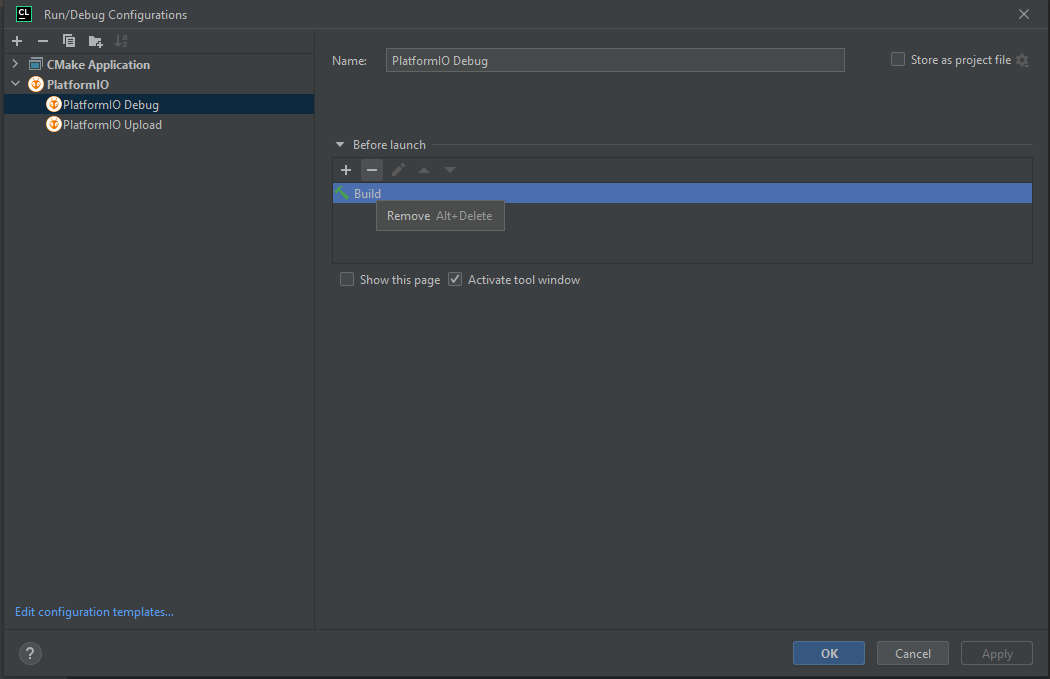
Building and Flashing
Select the
PlatformIO Uploadbuild option, and hit the play button. If all goes as planned, your build should and your board should be flashedNote: PlatformIO automatically detects upload port by default. You can configure a custom port using
upload_portoption in platformio.ini
Flashing with Espressif Flash Tool
Open the IDF as a cmake project. Then open the blink project. (esp-idf/examples/get-started/blink/CMakeLists.txt) The flash tool can be found here I may do a future writeup on this one, but not now.